Updating Colors and Fonts on Your WordPress Site

After content, colors and fonts have the highest impact on the look of your website. But you have probably noticed that updating your colors and fonts on your WordPress site is not as intuitive as you would like it to be. However, when you find the right tools, updating your colors and fonts on your WordPress site isn’t that difficult. The hardest part is finding the tools. This tutorial will show you how to obtain all of the tools you need to update your colors and fonts, and it will show you the most efficient way to update your colors and fonts once you have found those tools.

Picking the Right Theme

Not every theme makes updating colors and fonts on your WordPress site possible. And using plugins to update colors and fonts is usually convoluted.

Your theme is the thing that has the highest impact on how your colors and fonts are set. The whole reason that themes were created was to create a foundational mechanism for determining how your site looks. This is the reason that your theme ought to be the thing that determines your font and colors.

Most themes give you little control over your colors and fonts. But a few themes will give you a wide spectrum of choices. One such theme is the Big Media theme. The Big Media theme is a free theme and you can download it directly from your WordPress admin center by selecting Appearance > Themes > Add New. Then type “Big Media” into the search box.
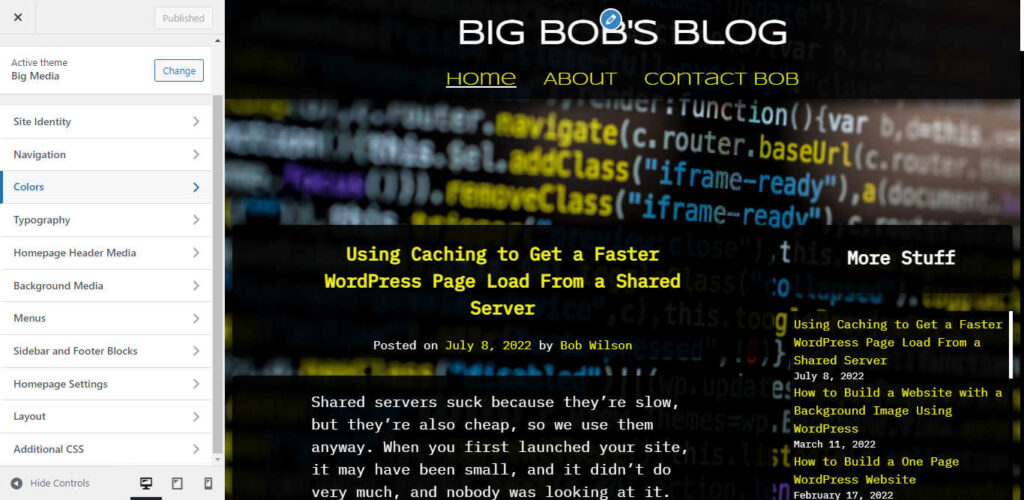
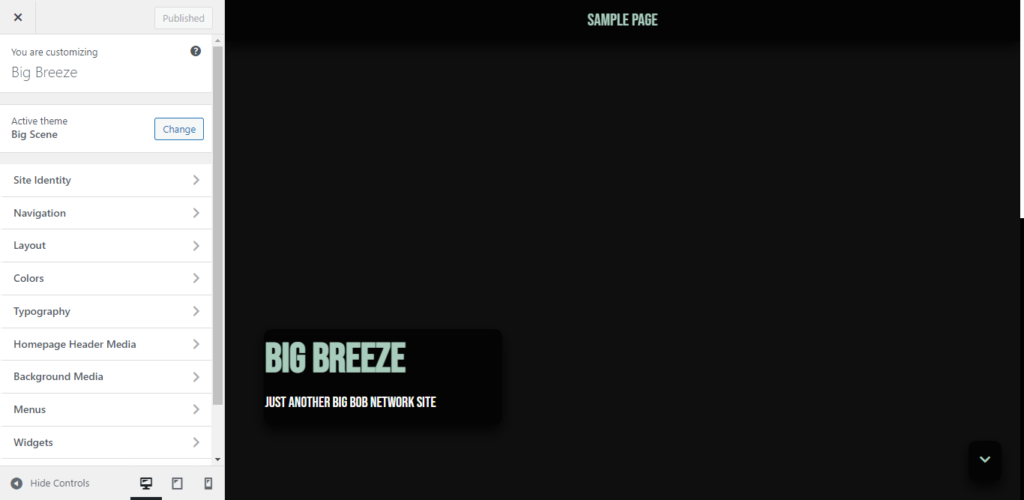
Screenshot of the Big Media Customizer

Picking Your Page Layout Style and Foundational Content

Now that you have a great theme, you need to consider your layout and content before updating colors and fonts on your WordPress site.

You should ask yourself if you want your site to be page driven, blog driven, or a combination of both. In other words, do you want to build your site with pages, posts, or both? If your site is blog driven or blog supported, then I would suggest considering a background image, especially if you are using the Big Media theme. You can add a background image in the “Background Media” section of the customizer.

If you are using the Big Media theme and you like the blog look, but you don’t actually want to have all of the blog features that go with it, then you can go into the Layout section of the Customizer and switch the “Big Pages” control to off. When you do this, it will create more background space for a background image when you build your WordPress site with pages.

If you’re sure you don’t want a background image and you are using the Big Media theme, then you should also consider a homepage header image. You can add this in the “Homepage Header Media” section of the customizer.

The Best Way to add a Background Image or a Header Image

Don’t worry about whether your image is appropriate to the theme’s default colors and fonts. Just focus on finding an image that you think looks great and facilitates your site’s message. You’ll be able to manipulate your theme to fit your content later.

If you want your image to be a background image, then it will need a lot of versatility. A great background image is an image where you only need to see a little bit of the image for it to be valuable. If you have an image that you like that doesn’t work well as a background image, then consider using it as a homepage header image.

If you want to add a homepage header image, then you should make sure that the image looks good on any screen dimension. Try setting the “Big Header Image” control in the “Homepage Header Media” section to both on and off and see how it looks on different screen sizes.

If you don’t have your own image that serves this purpose, then you can get tons of great images using the following links:

You probably want to load the original copy of your image onto your WordPress site to see how it looks. If you have trouble loading your image, then you can use GIMP to compress its size:

Images can crush your loading time. WordPress has features that automatically reduce the size of your images, but sometimes they don’t work, and even when they do, the image byte size can be larger than necessary.

Background images need to have a larger than average file size, but I have found that you can keep them looking good at pretty small sizes. I find that I can keep a background image looking good at an average size of 500KB and an average width of 2560px.

GIMP is free software that you can use to amplify compression and convert file types.

GIMP is a beast and is not the most user friendly. It is a full service image editor that has capabilities that extend well beyond what you will probably need for WordPress. However, if you are just using it to compress your images, then it isn’t that difficult to use. Just follow these instructions:

  1. In Gimp, go to File > Open, then choose the file you want to open. Gimp can be slow.
  2. Go to Image > Scale Image. Then reduce the width to 2560. You may be able to reduce this even further if you set the “Big Header Image” control to off in the “Homepage Header Media” section of the customizer.
  3. Go to File > Export As
  4. If the file type reads .png then delete the .png and replace it with .jpg. You may also want to rename the file.
  5. Click export, then lower the image quality to 50 percent or whatever value you think is best. You can check the box that reads “Show preview in image window”, and it will tell you what the file size will be.
  6. Click Export.

Picking Your Colors

If you are using the Big Media theme, then you can update your colors in the colors section of the customizer.

Colors should be defined by content. This is why it is best to choose foundational media before you choose your colors, then use the media as a basis for color selection.

Basic colors can be a great choice. The best way to start the color experimentation process is by selecting from the eight basic color squares. If you don’t like the default look, then a good second foundation is to try a black foreground with white text. Black foregrounds also tend to do a better job of revealing images when you reduce foreground opacity.

If you decide to experiment beyond the eight basic colors, then keep in mind that some colors look different on mobile, so you’ll want to test for that by viewing your site on mobile technology.

Don’t pick more colors than you need. The Big Media theme has a lot of color options, but that doesn’t mean that you can’t use the same color more than once.

Pick Your Fonts

If you are using the Big Media theme, then you can add fonts in the Typography section of the customizer.

Colors can affect how your fonts look, so you want to make sure that you pick your colors first.

Try lots of fonts. The Big Media theme gives you access to the entire Google fonts library, so be patient and keep trying fonts until you get exactly what is right for you. But keep in mind that it’s okay to just use one or two fonts. Some fonts look good by themselves, but they don’t always look good juxtaposed against other good looking fonts.

You may also notice that some fonts fit better than others, so you may have to update menu font sizes. You can do this with the “Menu Size” control in the Navigation section of the customizer.

You may find that your default fonts don’t always look ideal in every place that they have been set. But you can use the Additional CSS section of the customizer to refine font selection. For example, this theme added the following update:

.entry-meta,
.entry-footer,
.nav-links,
.comment-metadata,
.reply{
	font-family: "IBM Plex Mono";
}

You can figure out which class names that you would want to update using this tutorial.

Got Questions About Updating Colors and Fonts on Your WordPress Site?

If you have any questions then feel free to post them below.

How to Build a Website with a Background Image Using WordPress

Most people that try to build a website using a background image start with high hopes then wonder why they don’t see more websites using background images. They try for awhile. They run into some problems that they think that they can overcome. But from creating readable text to making the background image mobile compatible, the problems start to become overwhelming. Eventually most people realize that they are in over their heads, and they give up. There’s no shame in this. Setting up a site with a background image is hard. Fortunately, I have simple solution to these problems.

TL;DR

If you use WordPress, then you’re in luck. All the tools you need to build a site with a versatile background image are already available to you for free. Everything that’s complicated about setting up a site with a background image has been taken care of for you. All you need to do to get started is download the Big Breeze theme.

Assumptions

This tutorial assumes that you already have a webhost and know how to set up WordPress. If you don’t know how to do these things, then bookmark this page and go look it up.

Getting Started:
Adding the Big Breeze Theme

Once you have your WordPress site set up, go to the admin dashboard then go to Appearance > Themes, then click the “Add New” button, then type “Big Breeze” into the search bar. Next, go to Appearance > Customize. Click the “Change” button in the “Previewing theme” box. Find the “Big Breeze” theme and click the “Live Preview” button.

Adding Your Background Image

Next click on the “Background Media” tab, then click the “Select image” button, then select the “Upload Files” button and upload your image. If you don’t have an image, there are tons of free open source images available. Two of my favorite sources are:

The Rest of the Big Breeze Theme

The Big Breeze theme has options that extend well beyond the scope of this post. To learn more, you can check out its demo website.

If You Have Trouble Uploading Your Background Image

WordPress takes the legwork out of compression. It’s important that your file is compressed to a reasonable size. When you upload your image, WordPress usually does this automatically if your image is large. But on occasion, it struggles. When it does, it is usually because of how php is configured on your server. You’ll have to look up how your web host gives you access to your php.ini files. There will probably be a tool in your dashboard. How you access it will vary from host to host. Once you have found it, you will probably find that you can upload the images you want with the following values:

  • max_execution_time = 360
  • max_input_time = 360
  • max_input_vars = 4000
  • memory_limit = 1024M
  • post_max_size = 1024M
  • upload_max_filesize = 1024M

Once you have done this, you will probably find that you can compress large images without any problem. You can tell the image has been compressed because the file size will be smaller, and it will usually have the word “scaled” added to the file title. If you are still having trouble compressing the images, then you may want to make the above values a little higher.

If updating your php.ini file is more than you want to deal with, then you can also elect to load a smaller version of your image or a different image. However, I would encourage you to try to learn how to update your php.ini file on your webhost because you will probably find that updating it will allow you to upload all of your website’s images more liberally, and updating the values will probably also generally improve site performance and content management.

Caveat for Background Images

There is one thing that you should realize about websites with background images. They do tend to load a little slower than websites without background images. All images reduce loading speed. But it’s important to realize that a lot of what people think users purportedly expect for site speed is driven by fear mongering bloggers that know that controversy equals clicks. However, if you take a look at more objective data, you’ll see that user expectations are actually a lot more modest than some people might lead you to believe. And if you don’t believe me, then consider this: Was this the fastest loading website you’ve been on today? No? Are you still reading my post anyway?

When you get hung up on what you think you’re supposed to do, then you can deny your creative potential and the things that people would want if they were available.

Ways to Improve Site Speed when Using a Background Image

You may find that your site loads just fine without any help. Oftentimes, if you are willing to pay for a premium webhost (or just a quality host at a quality price), you’ll find that they have taken care of everything for you. However, you may decide that you would like your site to load faster. There are several tools that you can use. I recommend the following support software. These tools are ordered based on a combination of ease of use and impact of performance. All of the software is free or has a meaningful free version. I would recommend this support software for any WordPress site, regardless of what theme you choose or whether or not you choose to use a background image.

Surge Caching Plugin

Surge is one of the newest caching plugins on the market. It is easy to use and every measure of performance that I have tried gives me the impression that it works. The only caveat is if your web host adds a must use caching plugin like the Endurance cache, then you may have to deal with conflicts.

Jetpack Boost

Jetpack Boost is also simple and effective. The only caveat is if you use it with the Big Breeze theme, it will disrupt the performance of the preloader if you decide to turn it on.

Jetpack Site Accelerator

Jetpack Site Accelerator is a feature within Jetpack. Note that Jetpack and Jetpack Boost are two different plugins. The site accelerator uses a CDN on some of your files, and it makes adjustments to your images to improve performance. Jetpack has its critics. It is a fairly large plugin. And some people don’t believe that the bloat it adds makes up for the performance enhancements that it provides. You should try it out for yourself and see how it performs. It isn’t that difficult to use.

Cloudflare

Cloudflare provides a more comprehensive CDN than Jetpack Site Acceleraor. It is also the most difficult of the performance enhancers to set up. If you got freaked out by updating the php.ini file, then you might want to stay away from Cloudflare. You’ll need to set up an account. And you’ll need to set up a plugin. This will require that you make changes on your webhost. And if you make a mistake, it can break your site. Look for and pay close attention to instructions regarding your security certificates. If you use Cloudflare, then you may find that it doesn’t work well with Jetpack Site Accelerator. Using redundant CDN’s can actually slow down loading speed.

GIMP

Images can crush your loading time. If you have a webpage that is loading slow, and you have images on it, one of the things to check is the file sizes of your images. If you have a page with a lot of images on it, getting your loading time down to a reasonable speed can be tricky.

Keeping your total image file sizes per page under 1MB is ideal. If you can get the total even lower, then it might help. But don’t be dogmatic. If it is above 1MB, then that’s fine, as long as you’re satisfied with your site’s loading speed.

WordPress does a pretty good job of compressing images right out of the box. If you only use a couple of images then you probably won’t have to do anything. WordPress also converts each image into four different image sizes to serve different screen sizes. So if you use WordPress to set your image sizes so that they are just large enough to fit the largest screen that they need to fit on, then you can get your file sizes even lower.

However, if you use a lot of images on one page and you use images types with large file sizes (like .png files), then you might find that WordPress does not provide enough compression support. GIMP is free software that you can use to amplify compression and convert file types.

GIMP is a beast and not the most user friendly. It is a full service image editor that has capabilities that extend well beyond what you will probably need for WordPress. However, if you need to compress your images more than WordPress provides, or you need to change the file type so it has a smaller file size, then you can follow these instructions:

  1. In Gimp, go to File > Open, then choose the file you want to open. Gimp can be slow.
  2. Go to File > Export As
  3. If the file type reads .png then delete the .png and replace it with .jpg. You may also want to rename the file.
  4. Click export, then lower the image quality to 50 percent or whatever value you think is best. You can check the box that reads “Show preview in image window”, and it will tell you what the file size will be.
  5. Click Export.

Assessing the Performance of Your Background Image on Your Site

You should expect your site’s loading performance to be inconsistent. That’s normal for any site. Generally speaking, the more discounted your webhost, the more inconsistent you should expect your site’s loading times. Shared servers are more inconsistent than dedicated servers. Sites on cheaper webhost’s will generally reap greater benefits from support software than premium hosts. So the more you know how to do it yourself, and the more modest you keep your performance requirements, the more you can get away with using a cheaper webhost. You should evaluate your site’s median performance. Don’t evaluate it when it is running at its fastest or slowest.

Conclusion

If you want to build a website with a background image, then you don’t have anything holding you back anymore. You have everything that you need to know and more. Go out there and build your site.

Question About Adding a Background Image

If you have any questions about adding a background image, then please post them in the comments area.

How to Build a One Page WordPress Website

This tutorial is a step by step guide showing you how to set up a one page WordPress website. It is meant to be read after my previous post.

Step 1:
Set Your Site Up with the Big Scene Theme

First, you’re going to want to set up your site with the Big Scene theme. Just follow this link to my last post.

Step 2:
Set Your Homepage

Now, you’re going to go to the “Homepage Settings” section of the customizer. Under the control “Your Homepage Displays”, select “A static page”, then select a page or add a new page if you don’t have one. Make sure that nothing is selected for the posts page section.

Step 3:
Turn Off the Underline Current Page Feature

Go to the Navigation section, then find the “Underline Current Page” tagline and turn it off. If you don’t see this control then you’ll need to leave the customizer and go back out to the admin center then go to the dashboard tab in the upper left hand corner then select updates and update to latest version of the Big Scene theme.

Optional

You may want to go into the Layout Section and turn off the “Page Titles” control.

Step 4:
Remove Your Excess Pages

Leave the customizer and go back out to the main admin page. Go to the pages and posts sections and delete every page that isn’t the front page, unless the page is important. If the page is important, then click edit under the page title, then when you’re inside the block editor click on “switch to draft” if it is not a draft already.

Step 5:
Create Your Sections

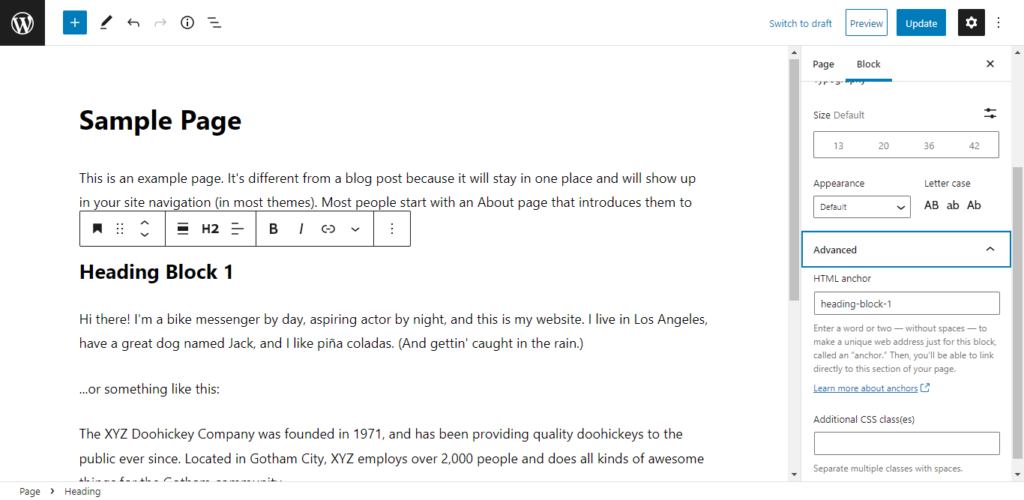
Your page should be broken up into different sections. You can define each section by adding heading blocks. For each heading block you’ll need an html anchor that can be found by looking under the advanced tab in the block section for the heading block.

If you are having trouble seeing this, then right click it and select “Open image in new tab”.

If you have WordPress 5.9 or greater, the anchor should be filled automatically. It’s also not a bad idea to add a prefix to each title such as “bb-” so it doesn’t get confused with an anchor created by WordPress or another plugin. You should make sure that your titles are intuitive because you’ll need to remember them later.

Step 6:
Create Your Menu

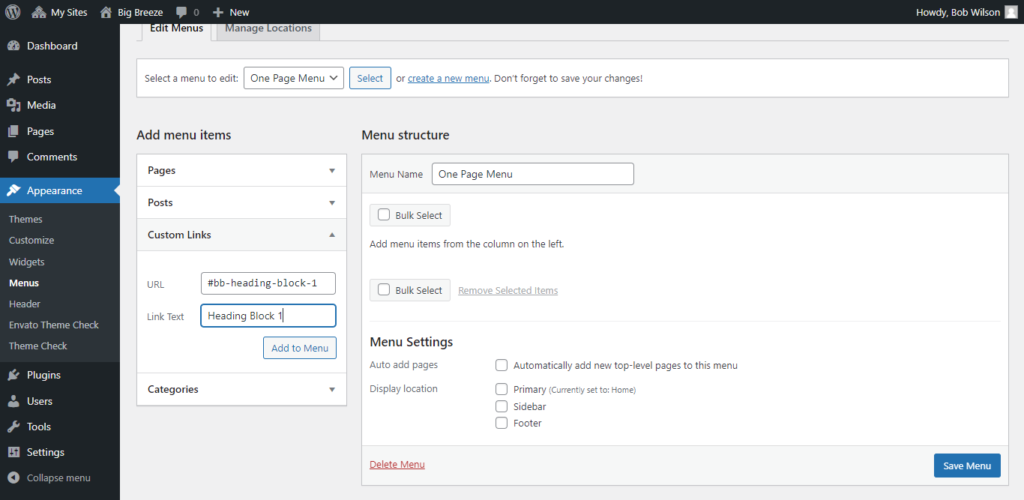
Go back out to the main admin page then go to Appearance then menus. Select “create a new menu” then add your links under the custom links section. In the URL section, type in “#” followed by name of the html anchor for each section.

If you are having trouble seeing this, then right click it and select “Open image in new tab”.

When you’re done adding all your pages, check the Primary box in the display location section and click save menu.

Step 7:
Test Your Page for Your One Page WordPress Website

Test out your page and make sure that you like the way that it looks. When you click on each link, it should scroll to the appropriate section. Make adjustments as necessary.

If you have any questions, then please post them in the Big Scene forum.

image credit

How to Build a New WordPress Website Using Just One Image

TL;DR

You can use the Big Scene theme to quickly build a great looking simple website:

Today I’m going to teach you how to start a new website using just one image. When building a website, it’s important to understand that websites are dynamic, and they’re meant to grow over time. So it’s not a bad idea to start with something simple that you can expand on. Maybe you have a business, or maybe you just have an idea. Whatever it is, it’s something that you need to claim as your own, and you know social media just isn’t good enough.

Assumptions

Building your own website can be daunting, especially if you want to do it all yourself. This tutorial assumes that you already know how to set up your own web hosting. Setting up a web host is a subject unto itself. If you want to try setting up a host on your own, there are already tons of great articles out there. So if you need a web host, you can just bookmark this page and google “web hosting.”

This article also assumes that you know how to set up WordPress on your webhost. How you do this will vary from host to host.

The Big Scene Theme

This tutorial utilizes the Big Scene theme. You can download it for free in your WordPress admin center. Just go to Appearance > Themes > Add New. Then type in the key phrase “Big Scene” into the search bar. Once you see it, select install, then select activate.

You may have noticed that this site is running on the Big Bob theme. The Big Bob theme is a great theme if you’re already using it. The Big Scene theme is like the Big Bob theme only it has more features and it has existing features that have been modified for user friendliness.

The Big Scene theme is a customizer driven theme with block extensions. With the release of WordPress 5.9, you may be wondering about the future of the customizer with the availability of the new site editor. But if you have tried out the new site editor, then you saw the beta tag on the menu option, and you can see it has a lot fewer options than the customizer. The site editor may be a great option in the future, but it will need to grow a bit before we can abandon the customizer. Right now, it’s safe to say that the new site editor is probably not a good option if you want to build a simple website that you can later expand upon.

Questions

If you have any questions after reading this tutorial, then please post them to the Big Scene forum.

The Customizer

As you’re working your way through this tutorial, you will want to hit publish on occasion, and you will also want to occasionally refresh the page. The customizer uses a mechanism known as selective refresh which means it doesn’t always refresh the entire page which means you don’t always see all of the changes.

Since you are just starting your site, you shouldn’t be too concerned about people finding it while it’s in the process of being built. Websites with content can be difficult to find, and websites without content are almost impossible to find. However if you are still concerned, your webhost may include a service that allows you to tell web crawlers not to search for your site, or you can use an under construction plugin.

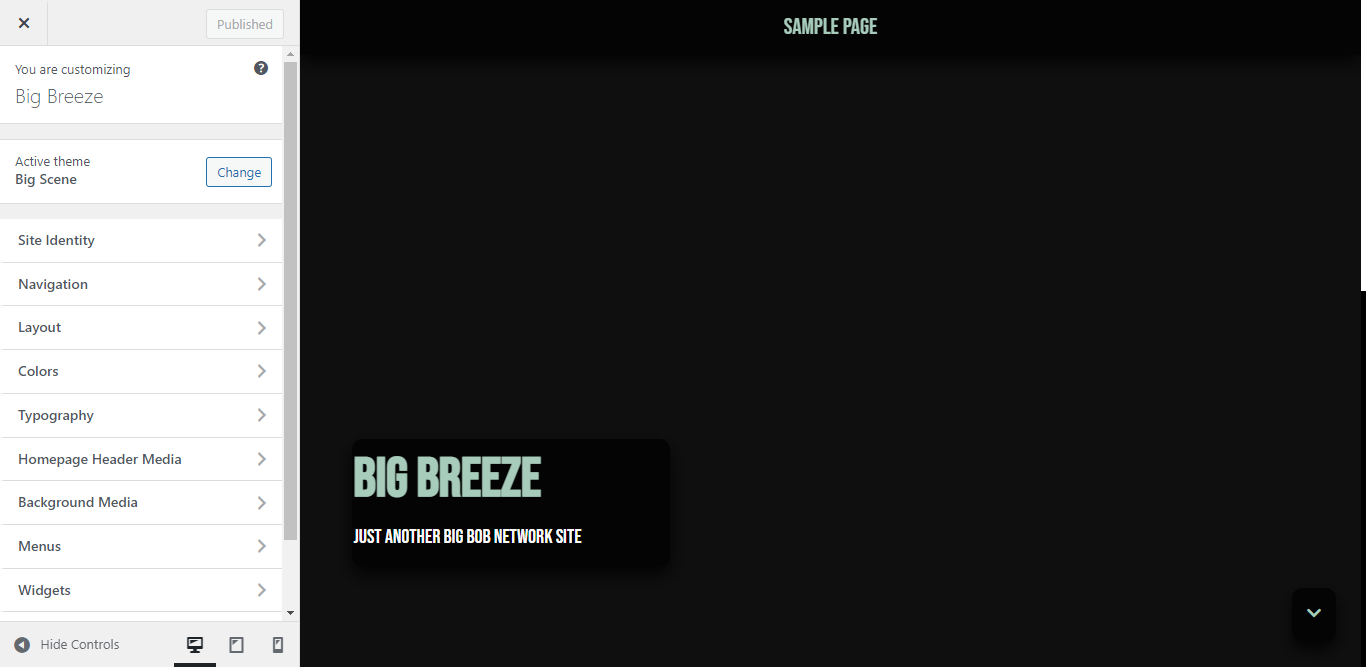
The Big Scene theme has features that extend beyond the customizer. But the customizer is where you will do most of your work. To get started, go to the side menu in your admin center then select Appearance > Customize. You should see a screen that looks like this:

If you have trouble seeing this or any image, you can right click on it then select “open image in new tab.”

The Navbar Menu

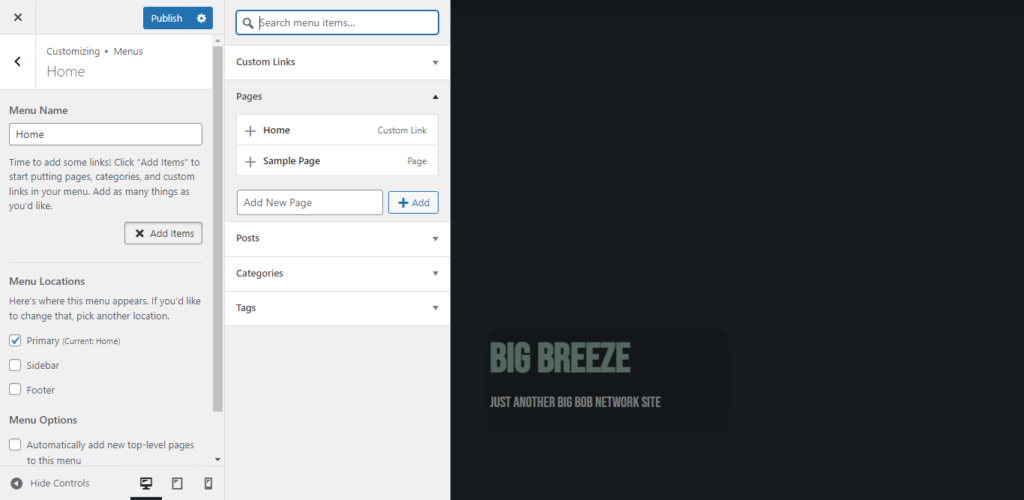
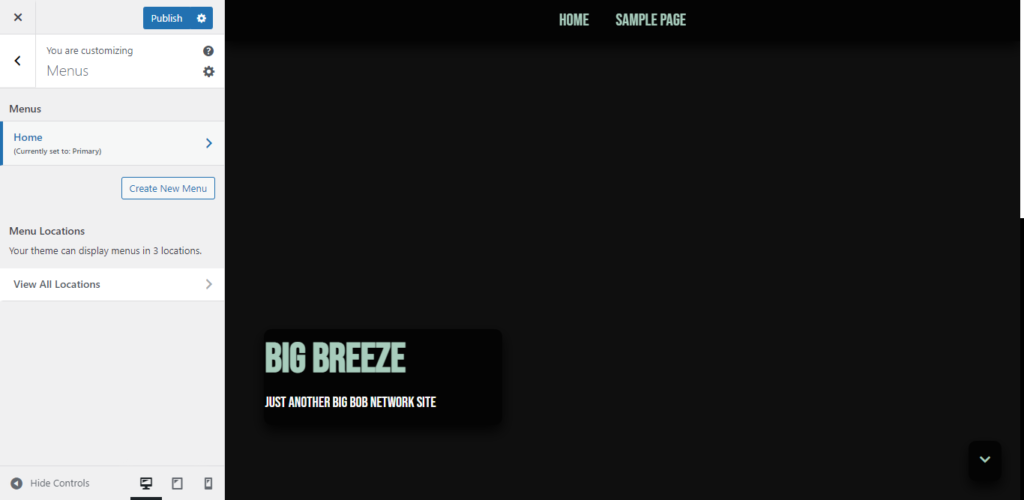
If you have a tagline, then you may want to leave the navbar in the default settings. But if you leave it in the default settings, then you will need a way to get back to the home page, so you will want to create a new menu. Go to the section titled “Menus”, then select “create new menu”, then select “next”, then select “add items”, then select “home” and “sample page”.

If you don’t have a tagline or you have one that isn’t important to you, then you may want to change your navbar style. Go to the Navigation tab then find the “Title Below Nav” control and select “Off”. Notice that your title also serves as a home link.

Colors

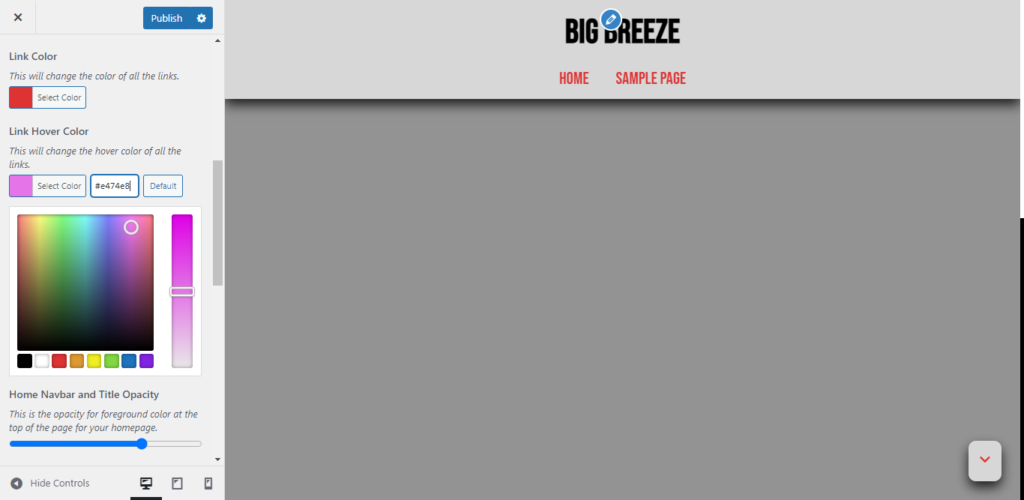
A lot of people choose a theme because of its color palette. But with the Big Scene theme you can choose any color palette that you want. So now you can go to Colors section, and start walking down the controls. Suppose you were to make the following selections:

  • Foreground Color: f4f4f4
  • Background Color: 939393
  • Text and Border Color: 000000
  • Title Color: 000000
  • Link Color: dd3333
  • Link Hover Color: e474e8

Now your site looks like this:

As you can imagine, you can spend quite a bit of time experimenting with this section. But before you try too many things, you may want to see how your new colors look with new fonts. Next we’re going to head over to the typography section.

Typography

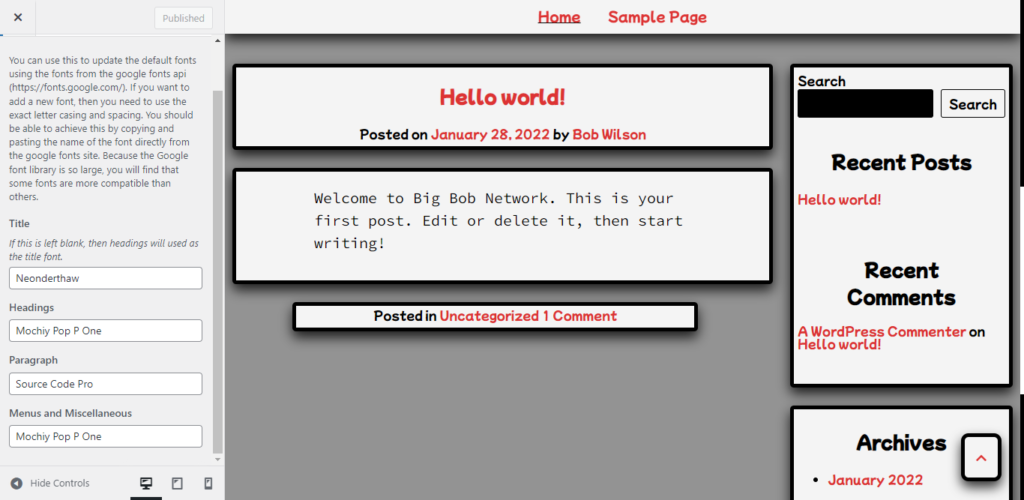
The Big Scene theme gives you access to the entire free Google fonts library. All you have to do is go to fonts.google.com. Find the ones you like then copy and paste the names into corresponding areas. For example suppose you chose:

  • Title: Neonderthaw
  • Heading: Mochiy Pop P One
  • Paragraph: Source Code Pro
  • Menus and Miscellaneous: Mochiy Pop P One

Your site will now look like this:

Background Image

Now you’re going to want an image. The Big Scene theme is designed so that you can use existing media to build up the look of your site. There’s tons of places where you can get free open source content. Three of my favorite resources are:

Today I’ll be adding this image.

One thing to keep in mind is image size. You’ll want to use an image that is ideally less than 1 MB but large enough that it still looks good on big screens. When you upload an image to WordPress, it will often reduce the size for you. If it doesn’t reduce it enough, you can go to the the main admin page then select Media > Library. Select the image then click “Edit image” and reduce the dimensions.

Finding usable images can sometimes be a tedious process when your new to website building, so it’s not a bad idea to start with an one image site when you are just trying to build a simple website. As you get used to the issues of finding usable images, you will find that the process gets easier and you will be able to build a complex website as easily as you built your simple website.

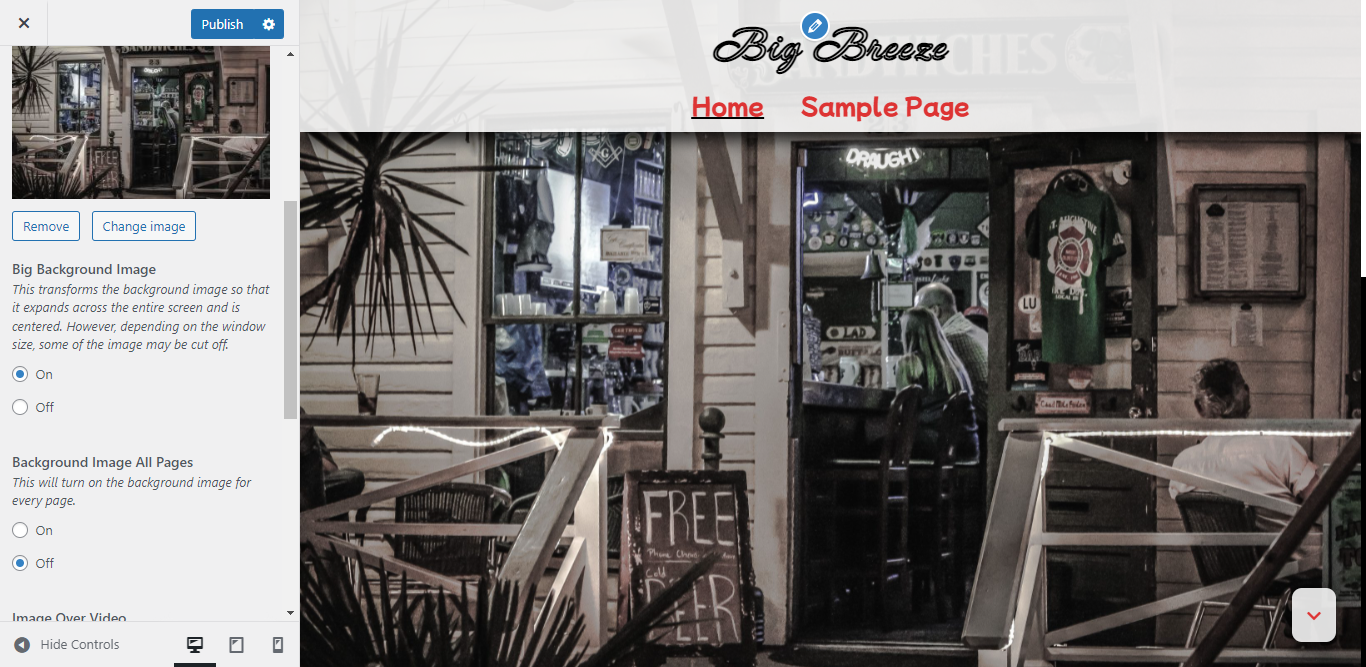
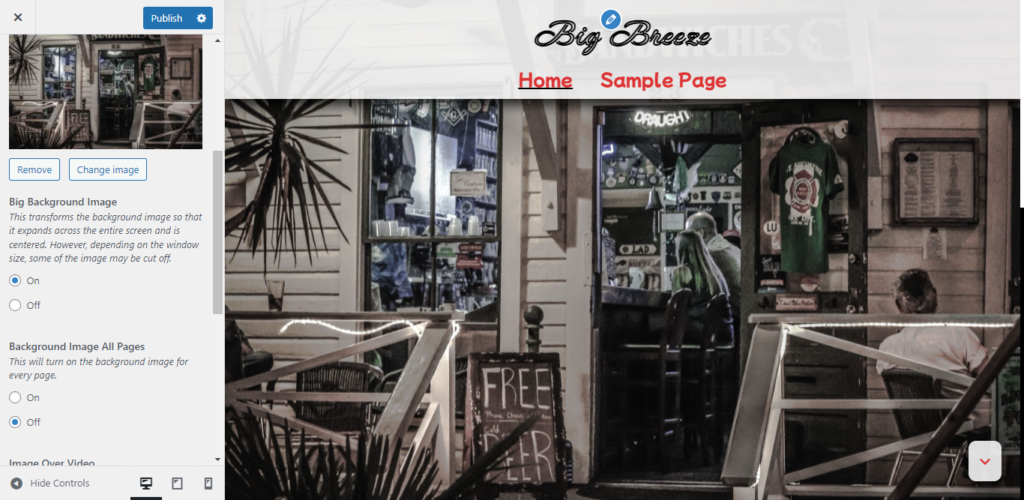
Once you have your image downloaded to your computer, you can go to the background media section and select the image that you want. Since you’ll only be using one image for the whole site, you will want to find the control that reads “Background Image All Pages” and turn it on.

Then you should evaluate your image. If everything about your image that’s important is focused toward its center, then you’ll probably want to find the “Big Background Image” control and turn it on. If there are important elements toward the edges of your image, then you’ll probably want to leave it off. You want to do this so that your image looks good on any screen size.

Once you’ve done that you’ll probably want to go back to the Colors section and find the three blue opacity range bars. These control how much you can see your image through your foreground colors.

The result should look something like this:

Since you’re only using one image turn the “Background Image All Pages” switch on.

Finishing Touches for a Simple Website

Since you are only using one image, you also want to go to the layout section, then find the “highlight featured media” control and switch it off. This will perform the following change on your site:

Note that the homepage still shows the entire image.

Turning Your Site into A One Page Website

If you don’t have much content, then you may want to consider starting off your website as a one page website. You can learn how in my next post. Otherwise, you can continue reading below.

Wrapping Up Your Simple Website

At this point, generalized advice isn’t very useful. The next section you will probably want to look at is the “Hompage Settings” section. If your site isn’t a blog then you will want to set your homepage so that it displays a static page, then you will want to delete your “hello world” post.

After that you will want to go into your pages and start adding your content.

As you continue to build your site into the future, you may want to start displaying unique featured media for every page. To do this, you will first want to turn the “highlight featured media” control back on and perhaps move the background image to the Homepage Header Media section.

You can learn more about adding featured media to individual pages here.

Once again, if you have any questions, then please post them to the Big Scene forum.

Featured Image Credit

Shouldn’t Daydreaming Count as Work?

My office and bedroom have stacks of notebooks and scrap paper filled with ideas that I scribbled down excitedly only to later realize that the ideas weren’t very good. So I never bothered to follow through with them. Sometimes I have to ask myself what the value of any of it is. I begin dialogues in my mind about the necessity of failing your way to success. But the metrics (however approximate) of how much time I spent on ideas that I didn’t use hang around in my head making me question the legitimacy and value of my behavior. Should my daydreaming count as work?

Proliferation sells

The best writers are frequently not the most financially successful writers. The most financially successful writers are often nothing more than people that know how to write well with consistency, so they can turn out a lot of product and claim name recognition.

I’ve always wondered what percentage of the work these authors create goes unpublished. Is it just the author’s early stuff? Is there a point when the author can stick their name on almost anything and it will turn a profit?

Nobody Gets Me

It’s easy to become cynical about the quality of craftmanship of anything when you consider how much success relies upon mere brand awareness. As a consumer of software, I often find a product that I really like, but its lack of popularity and proliferation makes me concerned about its sustainability.

I use software that frequently frustrates me wondering if I should be looking for something more independent. It makes me think about my own work—makes me feel alienated and ignored and part of the problem.

Why Daydreaming Matters

Time is in finite supply. And it’s easy to convince yourself that the rush to productivity is the best option. But you can’t have quality without trial and error. It used to be that software versions were developed with less frequency and with more substantial updates. Then the internet arrived.

There’s something to be said about making smaller updates. There’s safety when you make a smaller update because there is less of a chance that something will go wrong.

But the ability to constantly update pressures you into believing you should constantly update. If people don’t see what you’re doing, you get worried that people don’t think you’re actually doing anything. In a social media saturated culture where every moment of people’s lives has something jockeying for their attention, it’s easy for an individual (even one with talent) to be forgotten. And it’s easy for large organizations to stomp out smaller organizations and individuals using little more than name recognition and feature creep.

Don’t People Want Quality?

You can bake the best damn chocolate cake in the history of chocolate cakes. But if very few people eat it, then you’ll have to wonder how many people would really like it. If you have a dream of bringing your cake to a wider audience, do you have the means to release it to a wider audience. What if you spend the time and resources necessary to begin distribution, but nobody sees that the cake is available. Or maybe they see it, but they don’t realize how good it is because they don’t have the time to stop and taste it.

What are you supposed to do? Are you supposed to throw all your creativity and ambition in the toilet? Convince yourself that the cake isn’t really very good? Come out with a whole line of cakes in case people don’t like chocolate even though you don’t really think those other cakes are all that great?

Shouldn’t Daydreaming Count as Work?

How many ideas did you have to try to get that chocolate cake just right? How many times did you wake up early in the morning and make notes in your recipe book just to later realize that your new ingredient ideas weren’t even worth a trip to the grocery store? Could you have used that expended energy to climb your way up to Senior Vice President of Whatever instead of trying to venture out on your own? What’s the value of all the failure you had to endure to learn how to make a great chocolate cake? What if we took more time to appreciate our dreamers? Shouldn’t daydreaming count as work?

Image Credit