A Long Term Plan for Building and Maintaining a Website

Websites are dynamic. Building a GOOD website takes time, and maintaining and updating a website lasts indefinitely. So it can be helpful if you have an outline that you can keep coming back to so that you don’t lose track of what you are doing.

How to Read this Post

This is a blog post that you will probably want to come back to again and again. You can read it all at once, but you don’t have to. You should bookmark this post. Then you can come back to it after you have been distracted by non website building related work. This post contains lots of links that may take you through multiple days of work, so be patient and focus on improving your website one session at a time. If you take the time to put the work in, then you can make your website great.

It will probably be simplest if you follow each lesson in the order that it appears, but this isn’t mandatory. Even if you have already started your website, if you feel lost and confused, then this post can be helpful. It can show you how to overcome some fundamental problems that may have been nagging you for years.

Step 1: Organize the Information that You Need for Building and Maintaining a Website

If you have never built a website, and you don’t have any education in software development, then you are pretty much at the mercy of the internet, and the internet is really disorganized. This post will not tell you everything that you need to know, and it will not lead you to everything that you need to know. But it will help give you a great foundation that you can keep coming back to so that you don’t fly off onto a tangent in the wilderness of website development. If you ever feel overwhelmed and don’t know what to do, then reading this post from the beginning can be a great way to troubleshoot and find the solution to your problem.

Step 2: Determine Your Economy for Building and Maintaining a Website

You can’t bring a website into existence simply through the power of your imagination. You need resources. Before you take any action, you need to determine how much time and expense is necessary to build your website your way. Learn how to allocate fundamental resources for your site.

Step 3: Set Up Your Webhost and Foundational Software for Building and Maintaining Your Website

I never assume my customers will be running their website on a high quality managed webhost. I always assume that they are using something cheap and unmanaged, and they will need free support software to make sure that their sites load properly. If you are paying extra for managed hosting, then you may be able to skip some of these steps. However, there are five things that you will need to set up a site with unmanaged webhosting on a shared server. If all you have done is purchase a webhost, then you should give yourself a considerable amount of time to go through each of these steps. They will take awhile.

  1. Content Management Software: Learn about WordPress.
  2. Template Management Software: Learn about WordPress themes.
  3. Caching Software: Learn how to get your pages loading fast without an expensive managed webhosting plan.
  4. SEO Software: Learn to easiest ways to get your website noticed by search engines.
  5. Image Manipulation Software: Learn how to make your images look good without sacrificing page load speed.

Step 4: Set Up Your Website and Add Content

Now that you have all of the software that you need installed, you can get into the business of setting up your layout and adding content. It is usually simpler to work on your layout before you add your content, but building a website isn’t a perfect process, so don’t let yourself get frustrated if you can’t or don’t do things in the ideal order. Below is a list of steps for building or updating your site’s content and layout. You should expect getting though this entire list to take a significant amount of time.

  1. Update your theme. Updating your theme is usually difficult. But if your site isn’t doing what you want it to, then jamming another plugin into it probably isn’t the solution. If you want to make a real change, then you should probably take the time to change your theme. I highly recommend the Big Themes.
  2. Set the right colors and fonts. Your colors and fonts will have more influence over how your site looks than anything else. Keep experimenting with them until they match your site’s message.
  3. Set your main navbar properly. A great navbar will make your user’s experience easy, and it will make them want to continue using your site. But a bad navbar will make them want to leave your site. Your navbar will impact how the rest of your site works, so take the time to set it right.
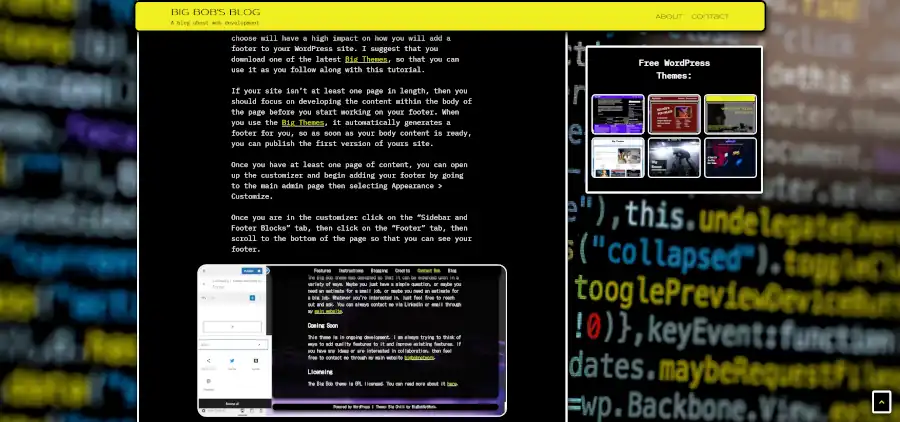
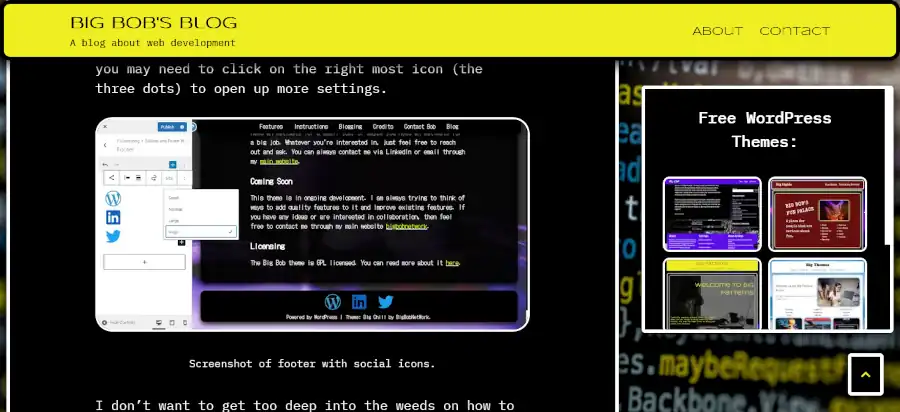
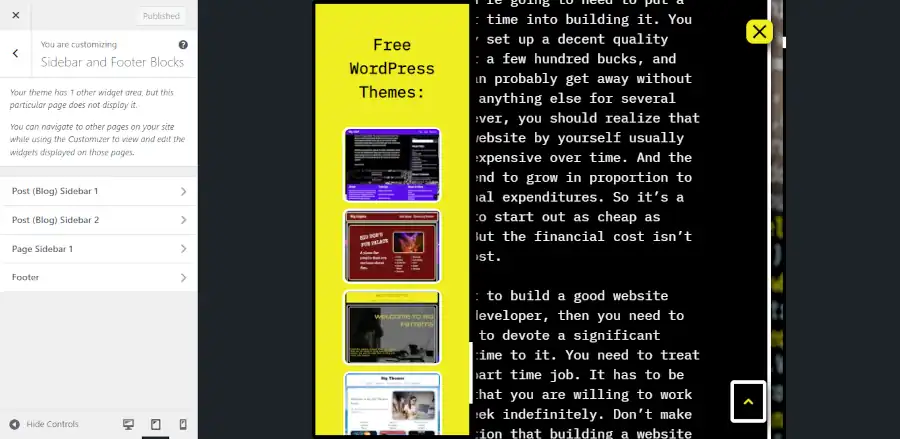
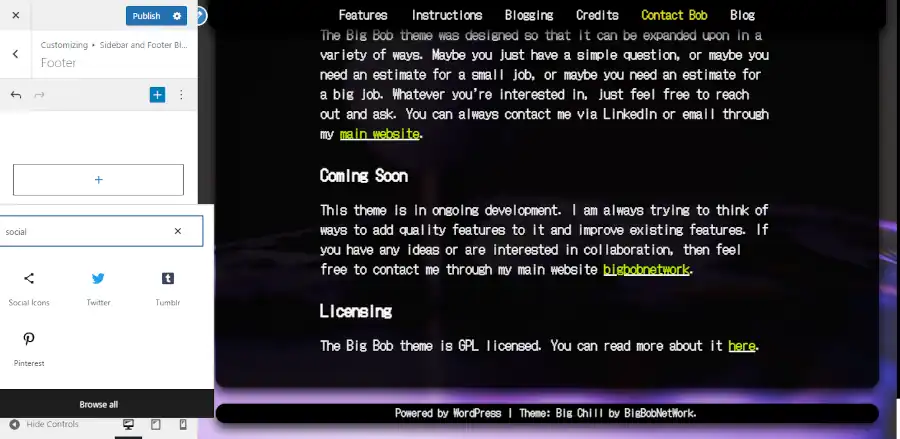
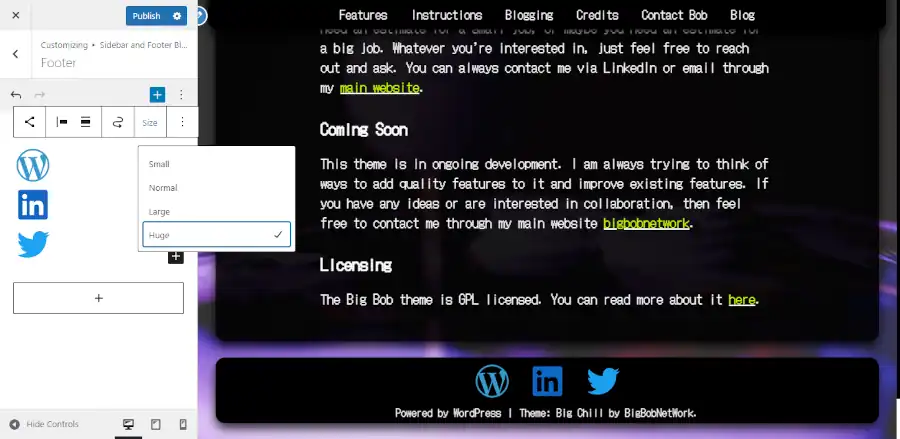
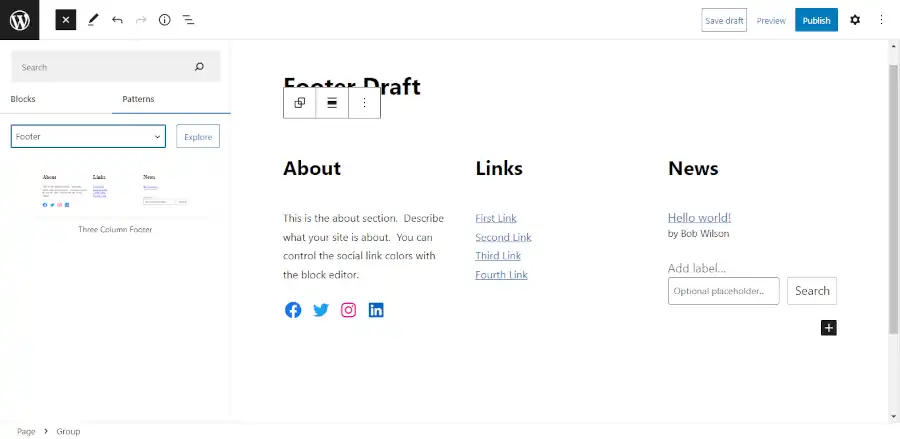
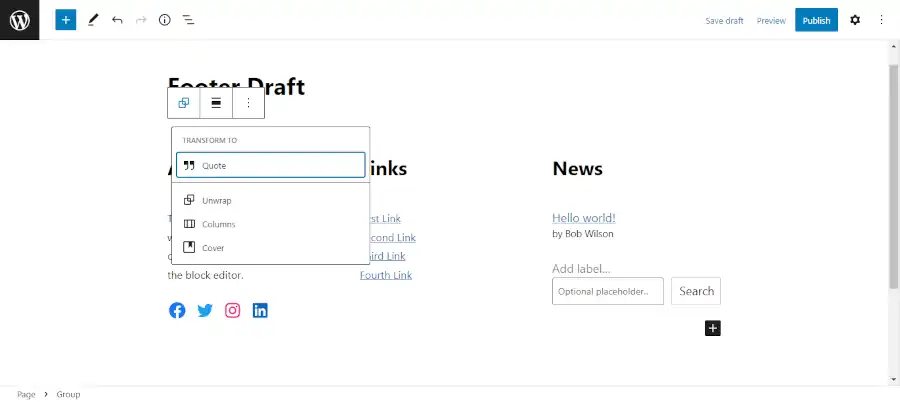
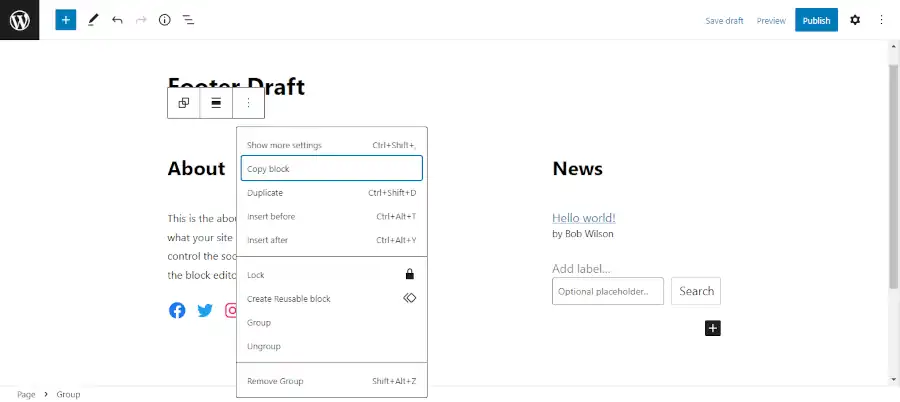
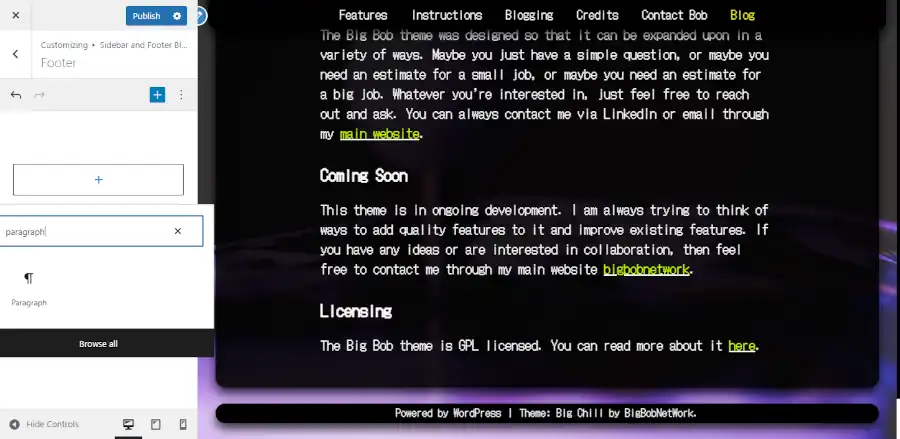
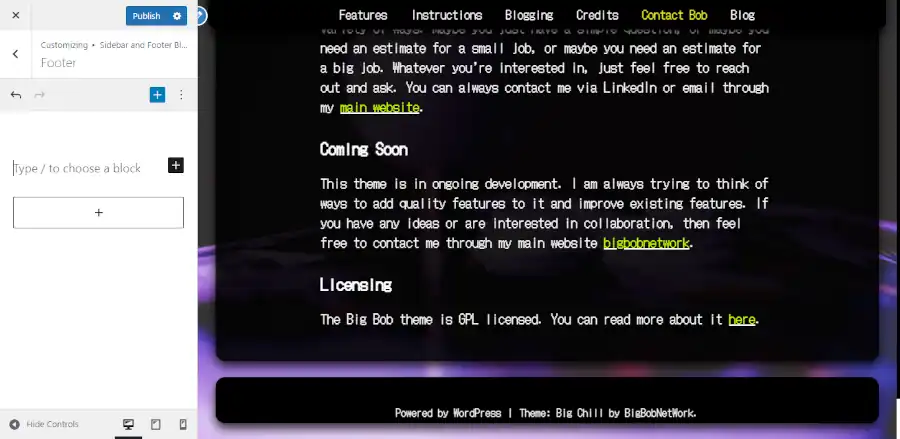
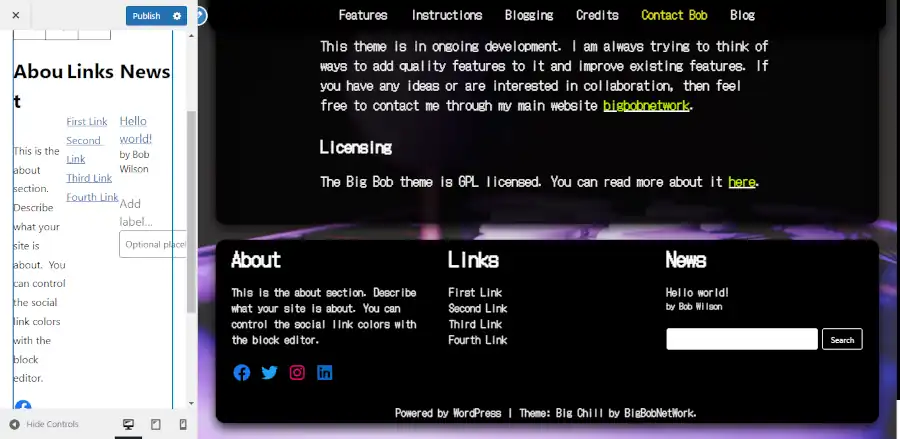
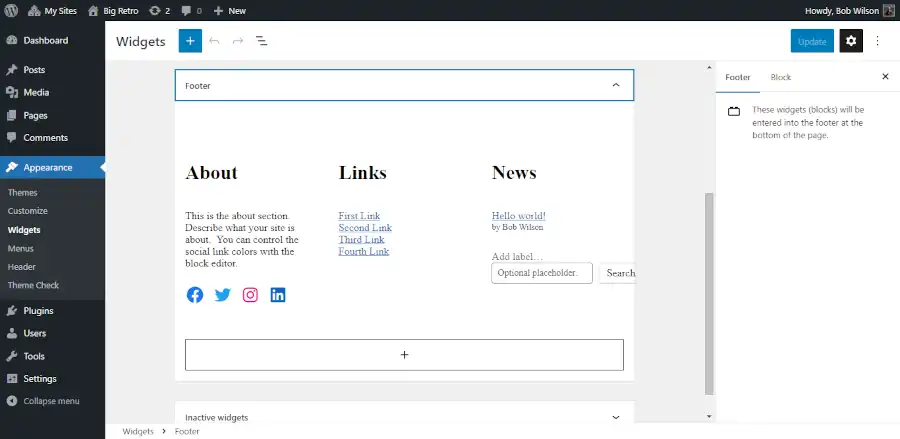
  4. Learn how to build a footer. Not every site needs a footer, but too many people don’t bother with them because they don’t even know how to set one up. Most sites that have a significant amount of content ought to have a footer, so learn how to set one up.
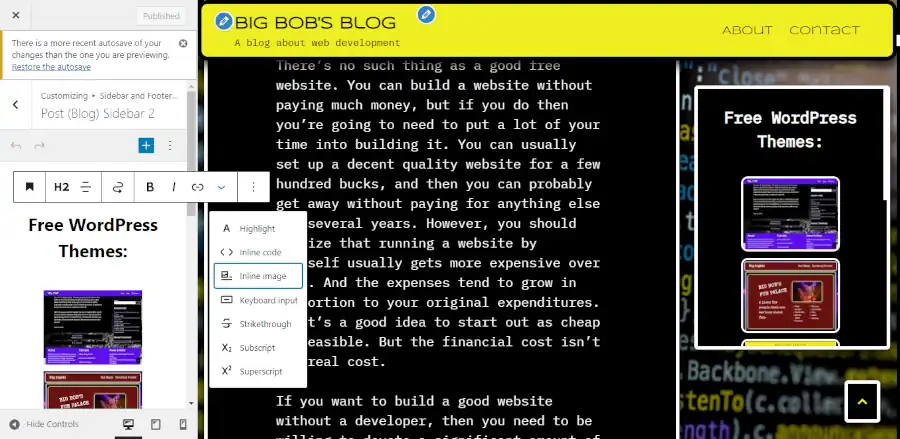
  5. Learn how to build a sidebar. If you are blogging, then learning about sidebars is a must. But even if you are just building a regular website, sidebars can be very useful, especially for stuff like advertising.
  6. Build a one page site. If you don’t have a site set up yet, then you have probably grown frustrated with how long this process has taken. Building a one page site is a great way to start your website presence. You can grow your website into multiple pages as time and content becomes available.
  7. Add foundational content. If your site is still looking basic, then you can use simple features to add a lot of style. You can add images and video.
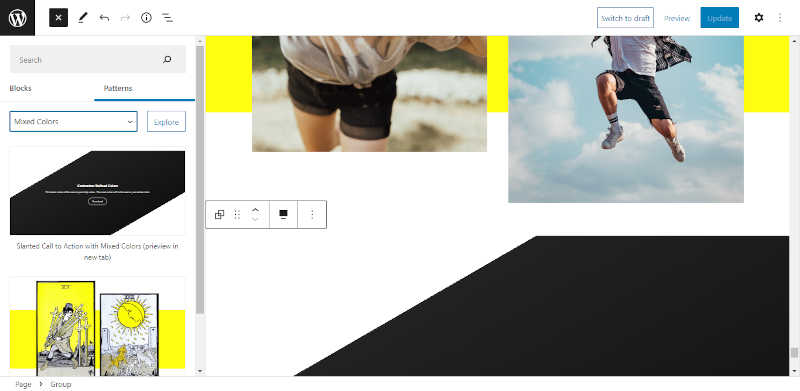
  8. Create more sophisticated content. There are lots of free tools available for styling and organizing content. You should learn how to use them if you want your website to be taken seriously.
  9. Get into the weeds. If you’re not a developer, then you should try to avoid coding as much as possible, but sometimes using a little coding is the only way to get something exactly the way you want it.
  10. Ask for help. Developing websites is a collaborative process. Nobody builds a website in pure isolation. People that are afraid to ask questions usually make avoidable mistakes.

Questions?

I would like this post to be a living document that I can update periodically. If you think that there is something that ought to be added, or there is something about it that you don’t understand, then please post it to the comments area.

How to Add an Advertisement to a Sticky Sidebar

Screenshot of a sticky advertisement

People don’t use websites to view advertisements. If you advertise too aggressively, then you will annoy your readers, and encourage them to leave your site. However, if your advertisement is too subtle, then nobody will notice that it is there. A sticky sidebar is a great way to get your advertisement noticed without disrupting your reader’s reading experience. This post will explain how to add an advertisement to a sticky sidebar.

Assumptions

This post assumes that you are familiar with WordPress and WordPress themes and that you know how to set up a website. It also assumes that you are familiar with widgets.

Before You Get Started Learning How to Add an Advertisement to a Sticky Sidebar

If you want to learn how to add an advertisement to a sticky sidebar, then you need a WordPress theme that supports sticky sidebars. One of the Big Themes would be a great choice, and the Big Chill theme would be an ideal choice because it is the latest Big Theme, and it has updates to maximize sticky sidebar compatibility with browsers. You can download Big Chill by going into to your WordPress admin center, then select Appearance > Themes > Add New, then type “Big Chill” into the search box.

Once you have installed your theme, you will be able to add your advertisement by using the customizer. You can find the customizer by going to the main admin page then selecting Appearance > Customize. Once you are in the customizer, you will want to select the “Sidebar and Footer Blocks” panel.

Screenshot of “Sidebar and Footer Blocks” section of the customizer

There are two areas where you can add sidebars. You can add sidebars to your pages and you can add sidebars to your posts (your posts are used if your site has a blog). Each sidebar area allows for two sidebars. Sidebar 1 is set first. It will be sticky if no other sidebar is displayed in that section. Sidebar 2 will be set underneath sidebar 1 if sidebar 1 is set. If sidebar 2 is set then sidebar 1 will remain static and sidebar 2 will stick.

If a sidebar sticks then it will size itself relative to the screen size and offer a scroll feature if the content exceeds the the viewport’s allowance.

Screenshot of sticky side advertisement adjusted for screen size

This is an important consideration. Many people will set their sticky advertisements without consideration for every conceivable screen size. I have personally witnessed many sticky advertisements that have not fit into the viewport of a 1366 x 625 screen, and it was impossible for me to access the entire advertisement. It also makes the website look unprofessional and sloppy.

Another important consideration is how to deal with the advertisement on mobile. There isn’t enough room for a sidebar on a smart phone screen. The Big Themes resolve this problem for you by setting your advertisement underneath the menu in the slide panel.

Screenshot of advertisements in slide panel.

A concern that you may have with this method is that your advertisement may be overlooked on mobile. However, you need to consider that the premise of this advertising method is that it minimizes the obstruction of the reading experience. There isn’t a good way to make sure your advertisement is seen on a mobile browser without obstructing the reading experience because the mobile viewport is so small.

If you want to make sure that the advertisement has a higher probability of being seen on mobile, then I would suggest that you add a copy of the advertisement into the body of your content or your footer and accept that your reader may have a more obstructed reading experience.

What is the Best Way for YOU to Add an Advertisement to Your Sidebar.

Now that you know the basics of how your advertisement will function, you can begin designing and setting your advertisement into position. The first thing that you should ask is, do you need anything placed in the sidebar area other than an advertisement? If the answer to your question is yes, then I would suggest that you add your content that doesn’t advertise into sidebar 1, and set your advertisement into sidebar 2. Otherwise, you can just set your advertisement into sidebar 1.

The next question that you will need to ask yourself is, how much space do you need for your advertisement? There are a number factors that can influence this decision, and there a number of solutions for dealing with those factors, and it is impossible to consider every use case. However, I do have a solution that is capable of resolving a number of use cases.

How to Add a Heading with Inline Images

A simple solution to displaying one or more advertisements in a sidebar is to add them as inline thumbnails and set them into a scrolling container. The advantage to using a scrolling container instead of a slider is it displays more images at once on large screens. Since you are using one of the Big Themes, you don’t have to do anything to set up the scrolling feature. A scrolling feature will be automatically added if the viewport requires it.

You can add a heading with inline images by proceeding through the following steps

  1. Select the sidebar that you want to use to display your advertisement.
  2. Add a heading block announcing your advertisement, then add space under the text by pushing shift + enter. It is also a good idea to set the alignment to center.
  3. Click the dropdown arrow (see image below) and begin adding inline images. It is recommended that you set the width of your images to 150 and that you convert them to WebP prior to uploading them.
Screenshot of adding inline images.
  1. Add a custom class to your heading block. In this example, I will be adding the class name “bb-free-software”, but you can name your class whatever you want. You can open up the side panel in the customizer by clicking on the three dots in the image above, then select “Show more settings”.
  2. Go to the Additional CSS section of the customizer and add the following custom CSS (you’ll need to adjust the class name to the name you added):

    .bb-free-software img {
    border-radius: 10px;
    margin-left: 5px;
    margin-right: 5px;
    }
  3. Add links to your images. You can do this by selecting each image and clicking on the the link icon displayed in the screenshot above.
  4. Check to make sure that your images look good in different viewports.

This is just one of many ways to set an advertisement into a sticky sidebar. Feel free to experiment with adding different kinds of blocks and patterns to your sidebar.

Questions?

Thanks for reading. If you have any questions then feel free to post them in the comments section.

A Guide for Building a Website in 2023

It’s outrageous how many different ways there are to build a website. If you need a website, but don’t have the budget to hire a web developer, and you don’t have any experience building a website, then it’s easy to get sucked into bad choices. This guide will give you a broad overview of how to set up a website so that you can sustain it and improve it over time. It will help you set realistic expectations for the kind of sacrifices that you will need to make and the level of talent that you will need to have to build and maintain a website. And it will help you avoid the pitfalls that would likely cause you to give up and hire a developer or abandon your site completely.

Assumptions

This post is for raw beginners. There are no assumptions of knowledge for this post. But that isn’t meant to imply that this post will tell you absolutely everything that you need to know about building a website. I have provided links when it is intuitive, but you will also need to learn things on your own. It’s okay if you don’t understand everything that I reference. If I reference a piece of tech or a concept that you have never heard of, then you don’t need to immediately look it up. You will learn about things later as go through the process of building your site.

Building a GOOD website isn’t easy. If you have it in your head that a website doesn’t have to be much more than a glorified business card, then my advice is that you probably shouldn’t bother building a website at all and stick with promoting yourself or your business through social media, or you should hire a pro to help you build your site. It’s better to have no website than it is to have a bad website. However, if you can accept that reading this post is just the tip of the iceberg for what you need to learn to build your website, then you are ready to begin your training.

How to Read this Post

This post is a pretty fast read, but it contains a fair amount of links, and the links will lead to more links. I would make sure to read this whole post at least once before you click on any of the links or make any decisions. You can bookmark this article, and use it as a primer for when you need to start working again.

Once you’re done reading this post, you will probably realize that you are going to need to set aside time to do even more research before you begin making any purchases or setting anything up. Oftentimes people will put off building a website then panic or get impatient and make a bunch of bad decisions when setting it up. Research and design are huge components of building a website, and you should consider those activities as serious and important work. Remember the carpenter’s expression, “measure twice and cut once.”

Step 1: Set a Budget for Building a Website

There’s no such thing as a good free website. You can build a website without paying much money, but if you do then you’re going to need to put a lot of your time into building it. You can usually set up a decent quality website for a few hundred bucks, and then you can probably get away without paying for anything else for several years. However, you should realize that running a website by yourself usually gets more expensive over time. And the expenses tend to grow in proportion to your original expenditures. So it’s a good idea to start out as cheap as feasible. But the financial cost isn’t the real cost.

If you want to build a good website without a developer, then you need to be willing to devote a significant amount of time to it. You need to treat it like a part time job. It has to be something that you are willing to work on every week indefinitely. Don’t make the assumption that building a website is something that you can bang out over a few weekends or a vacation and then forget about it. If you take that attitude, then your site probably won’t be very good (or at least nobody but you will be convinced that it’s good). If you’re too busy to devote at least four hours a week to building your site, then you might want to give serious consideration to paying someone to help you.

Consider hiring a pro. Even if you don’t hire a pro, you should consider the dichotomy between doing it yourself, and having someone do it for you. Consider how much a pro will charge you, and consider how much of your own time that you will have to give even though you are working with a pro. You don’t need to contact a pro to do this. You should do your own research on the internet. If you do contact a pro, then you should have a budget, and you should have a list of expectations. Otherwise, you may find yourself being taken advantage of. You can keep reading this post and this blog to begin getting an idea of what those expectations ought to be.

Step 2: Get a Webhost for Building a Website

Before you start building your site, your site is going to need to exist somewhere. You need a physical server so people can actually look up your site and view it. You’ll also want to buy a domain. Most webhosts will do this cheap, but there are other companies that specialize in registering domains that will do it even cheaper. If you are a raw beginner, HostGator isn’t a bad choice. It isn’t perfect, but if you are willing to take the time to set it up properly, you can get your site loading reasonably fast onto browsers at a relatively inexpensive price, and you get unlimited memory.

Do your research. Don’t choose the first webhost that is recommended to you. Take the time to consider other webhosts too. There are a lot of things to consider when picking a webhost, and most of them are pretty intuitive. However, the consideration that most people struggle with is caching. This is a complex subject that is usually hard for raw beginners to understand, and the result is raw beginners tend to choose a webhost with no idea about how their caching services work.

You should take the time to learn how caching works by reading this post before you decide which webhost is best for you. If you don’t then you will probably either end up paying for services that you could set up yourself for free, or you may end up with a slow website because you don’t know how to set up your caching services.

Another important consideration to make that raw beginners often overlook is the geographic location of your server. It is impossible to serve the entire world equally unless you have a substantial budget. You will need to decide which geographic region ought to get the best service. Once you have read about caching, the reason for why you need to make this sacrifice ought to become more clear to you.

Step 3: Select a CMS for Building a Website

If you are not a developer, and you want to build your own website, then a content management service is mandatory. Don’t worry right now if you don’t understand what a CMS is. You can research that later.

I highly recommend that you choose WordPress as your CMS. It will provide you with everything you need (and a whole lot that you don’t need) to build a sophisticated website. You can add WordPress to your webhost even if your webhost doesn’t provide a service for you, but most likely, your webhost will. There are other options for content management, but they tend to be either less accessible, less powerful, and/or produce results that are too generic and not very appealing.

Once you have your foundational WordPress website set up, you will need a WordPress theme. Nothing you do will have a higher impact on how your WordPress site looks and functions than your WordPress theme. If you like this blog, then using one of the Big Themes is the right choice for your first WordPress theme. The Big Themes have tons of documentation (including on this blog) and are updated on a regular basis.

After your theme is loaded, you will have a lot of options at your disposal. It can be overwhelming trying to figure out where to start. You may be tempted to try to add even more WordPress options. But you should be wary of trying too many things. You don’t want to get stuck in the startup stage of building your website because of paralysis by analysis. Stick with learning foundational tools, then consider whether or not you need more features in the future.

You should try experimenting with the controls in the block editor and the controls in the customizer. Don’t let yourself get frustrated if you are a little confused by them at first. The more you use them, the more intuitive they become. Try building a one page site, and experiment with block patterns. You don’t have to be a developer to do this, but you do have to be comfortable with learning tech, and you have to be willing to work.

Step 4: Keep Learning

Don’t expect to get your website to be exactly right the first time you set it up. Websites are dynamic. They are designed with the expectation that they will be updated. Most great DIY websites didn’t start out that way. It’s okay if you think that your website kind of sucks in the beginning. You can make it great as long as you’re patient and you’re willing to try to improve one little piece at a time. If you keep some time set aside in every week, then you can eventually make your website awesome.

Questions?

Learning this stuff can be a bit like drinking from a fire house, so if you have a question, then please post it in the comments section.

Image Credit

How to Add a Footer to Your WordPress Site

It’s not unusual for people to avoid consideration of a footer when they first start building a website. The reality is that a lot of websites don’t need large footers. For smaller websites, a large footer can be superficial and unnecessarily complicated. But even if you are just using your footer as a simple attribution line to let people know that they have reached the bottom of the page, you should still learn how to add a footer to your WordPress site.

Assumptions

This tutorial assumes that you are basically familiar with WordPress and WordPress themes and building a website. It also assumes that you are familiar with layout concepts such as navbars, sidebars, and footers. You should also have a basic understanding of widgets.

Before You Add a Footer to Your WordPress Site

A footer’s primary value is it serves as a place to add links. However, before you decide to add links to your footer, you should first ask if the links that you intend to provide would be better placed in your main navbar or a sidebar. Your main navbar should serve as the primary mechanism for users to navigate your site. Ideally, it should include links to all of the major areas of your site. There’s nothing more annoying than expecting your users to scroll down a long page to find the site map because the primary navbar is under populated with links. However, as your site grows, it’s possible for your main navbar to run out out of room. One solution is to extend your navbar into your sidebar. However, this can be prohibitive if your are trying to create section level sidebars.

When is It Time to Learn How to Add a Footer to Your WordPress Site?

The time to add a footer to your website is when your site has become sufficiently large, and/or you have a supporting online presence (like social media) that is sufficiently large. Hopefully, your site is more than just a glorified business card with your social media links. It should at least provide basic information about whatever it is you’re doing online. One of the great things about using WordPress is it is a content management service. That means you can start with a small site and add content to it over time.

The Early Site Footer

In the beginning, you may only have enough content to justify a one page site. That’s fine. At this point the only thing that you will probably need in your footer is links to your social media pages. Given that your site is so small, you may wonder if adding social media icons into your main navbar is a good idea. Well, it might be. There’s an argument to be made that you are making them easy to find. But you also have to consider that when you are doing that, that you may be giving the impression that you are saying, “Hey, you just got here. Now leave because my site kind of sucks.”

Make sure your site is really good before you decide to put your social media links in your navbar. Consider putting them in your footer after people have scrolled through your site and been impressed by what they saw.

Footers are extremely theme dependent. The theme that you choose will have a high impact on how you will add a footer to your WordPress site. I suggest that you download one of the latest Big Themes, so that you can use it as you follow along with this tutorial.

If your site isn’t at least one page in length, then you should focus on developing the content within the body of the page before you start working on your footer. When you use the Big Themes, it automatically generates a footer for you, so as soon as your body content is ready, you can publish the first version of yours site.

Once you have at least one page of content, you can open up the customizer and begin adding your footer by going to the main admin page then selecting Appearance > Customize.

Once you are in the customizer click on the “Sidebar and Footer Blocks” tab, then click on the “Footer” tab, then scroll to the bottom of the page so that you can see your footer.

Screenshot of footer tools

Most of the blocks that you can add should be automatically centered, but if they are not, then you can use the block tools to center them. The blocks have a lot of different tools. If you can’t find what you are looking for then you may need to click on the left most icon on the block toolbar to move up a level (you can keep clicking it to move up more levels), or you may need to click on the right most icon (the three dots) to open up more settings.

Screenshot of footer with social icons.

I don’t want to get too deep into the weeds on how to use blocks. The blocks are powerful, but they have a bit of a learning curve. You need to be patient with learning how to use them. The more you use them, the more intuitive they become.

You can continue to stack single blocks in a single column until you have all of the information that you want to provide. If your site isn’t too large, or if it just doesn’t need many links, then this may be all of the content that you will ever need to put into your footer. But if your site gets significantly large and needs more links then you may need a multicolumn footer.

Creating a Multicolumn Footer

A good rule of thumb for starting a multicolumn footer is to wait until your footer has enough content to justify at least three columns. Whenever you add content, you want to consider overall content management. You want to minimize how frequently you have to make major updates like changing the number of columns in your footer. Two small columns will likely still look good as one column, and two large columns usually still looks good spread out over three columns. I also would avoid using a four column footer because you’ll have to spend a lot more time worrying about space and size issues than if you stick with three columns.

The easiest way to add a multicolumn footer into the customizer is to use a block pattern. Unfortunately, as of the publication of this post, there is no way to call block patterns directly from the customizer. Fortunately, block patterns are just blocks, so you can easily copy a block pattern into a block section of the customizer from the block editor.

The simplest way to do this is open up a draft page and call a footer pattern from the block editor, then add it to the draft page. It’s a good idea to keep one browser tab open for your block editor and another browser tab open for your customizer.

Screenshot of a footer pattern in the block editor.

You can work on most of your content while your in the block editor. However, I wouldn’t worry about the colors until you get into the customizer. Using a block pattern is a good way to figure out which kind of blocks ought to go where. However, you can completely add and remove blocks from the pattern as you see fit.

Once you have finished updating your blocks, keep clicking on the left most block icon until you reach the top group block. You can be certain that you have reached the outermost block when clicking on the icon produces a “TRANSFORM TO” option.

Screenshot of outer group block selected

Then copy the entire block pattern.

Screenshot of a block pattern being copied

Now that your pattern has been copied to your clipboard. You can paste it into the customizer. First, open up a new paragraph block in the footer section of the customizer.

Screenshot of opening a paragraph block in the customizer footer section
Screen shot of “Type / to choose a block”

Then click the section that reads “Type / to choose a block”. Then you can either right click and select paste or hit ctrl + v (command + v on a mac).

Screenshot of a three column footer in the customizer

Now you have a three column footer on your website. From here, you will probably be able to make updates to and from the customizer, but if the space is too small then you can just copy and paste your footer back into footer draft page and work on it in there.

Using the Widget Admin Section

If you don’t want to learn another WordPress screen, then you can skip this last section of the tutorial. You don’t need to use this feature. However, it is worth noting that your footer will also appear in the Widgets admin Section. To see the Widgets admin section go to the main admin page then go to Appearance > Widgets.

Screenshot of the Widgets admin area

There are two reason that you may want to use this area. First, you will have more space to work with. Second, if you need an area that has more space to work in, then this will save you the hassle of copying back and forth between the customizer and the block editor. You can update your footer directly from this area.

Questions About How to Add a Footer to Your WordPress Site?

If you have any questions, then please post them in the comments section.

How to Get Started with WordPress in 2023

You may be a bit confused about how to get started with WordPress in 2023. There are many ways to build your site with WordPress. But you would be wise to avoid trying to learn how to use all of the tools that WordPress has to offer. This post is designed for new and experienced WordPress users. It doesn’t cover all of WordPress’s features. But it covers all of the foundational features that you can use to build your site in 2023. If you are new to WordPress, then you may only need to read the first part of this blog to learn what you need to know.

What this Article Doesn’t Cover

This article is written more as a review than a tutorial. It is designed to teach which features that you are likely to want to use. But it teaches you very little about how to actually use those features accept as it relevant to whether or not you may choose to use them.

TL:DR

Just pick a theme like one of the Big Themes and rely exclusively on the block editor and the customizer.

WordPress Features that You Can Get Started with in 2023

There are five primary features that you can consider if you are learning how to get started with WordPress in 2023.

  1. The Customizer
  2. The Classic Editor
  3. The Block Editor
  4. Page Builder Plugins
  5. The Site Editor

The Customizer

The customizer is the best way to set global values for your WordPress site in 2023. It contains controls that are written for your WordPress theme. The simplest way to think about a WordPress theme is to think of it as website template with layout and content controls. If you want to see some demonstrations of what themes do, then you can check out the Big Themes.

Screenshot of the customizer

The Classic Editor

The classic editor used to be the primary way to build content into the body of websites with WordPress. It is still supported, and it still works with a lot of themes such as the Big Themes, and there is still a loyal following that thinks it is the preferred way to build a WordPress page. When the block editor (discussed below) first came out, there were a lot of people that thought it’s user interface was awful and was an inadequate replacement for the site editor, however the block editor has improved since then, but its user interface still has a steeper learning curve then the classic editor. I would only use the classic editor if you are already used to it. If you are unfamiliar with the classic editor, then I wouldn’t bother trying to learn how to use it because the block editor is simply more powerful.

The Block Editor

The block editor has foundational controls for building WordPress page body content. These controls can be enhanced by theme developers. If you want to see some demonstrations of what themes can do with the block editor, then you can check out the Big Themes. Themes like these often provide block patterns that allow you to load great looking content quickly. If you learn how to use the block editor and the customizer, then you will have everything that you need to build a site once you have picked a great theme. However, there are some other features that you may want to be aware of.

Screenshot of the block editor

Page Builder Plugins

People that find the block editor too confusing and the classic editor to be too basic will often turn to page builders such as Elementor to create their theme. There’s nothing inherently wrong with doing this, but you need to realize the kind of overhead considerations that you will have to endure by choosing a page builder.

  1. You still need a high quality theme such as one of the Big Themes.
  2. You’re going to need to pay a subscription fee if you want to use any premium page builder features which tend to constitute the bulk of page builder features.
  3. Page builders make your file sizes much larger, so you must make sure that you set your images properly, and you are using caching, and you may need a more expensive webhost.
  4. You need to continue relying on your page builder and pay for its subscription as long as you want to use the pages that you have built.
  5. The user interface has limitations and often makes it difficult to build custom designs into it. The block editor gives developers and DIY users more options to extend its features.

The Site Editor (This section was updated on 3/21/23)

The site editor (formerly known as the full site editor) has been out for over a year, and it is still in its beta stage (although the beta tag will be removed for version 6.2). While it seems like it may have potential for use in the future, it currently has a number of problems that make it difficult, dangerous, and unnecessarily complicated. Its potential seems like it is based in it’s user interface, but it still seems like it needs a considerable amount of development before it becomes worth using.

Problems with the Site Editor

  1. I haven’t seen any features that can be added to a website with the site editor that can’t be added to a website with the customizer and the block editor.
  2. It’s user interface is still clunky, and it is certainly inferior to page builders, and it doesn’t seem to provide any meaningful benefit over just using the block editor.
  3. It relies on page templates that could be reproduced by block patterns; but unlike block patterns, once you have implemented them, they seem to disappear when you change themes.
  4. I have seen site editor driven themes delete content from customizer driven themes when the theme is changed, and the content needs to be rewritten if you want to switch back to the customizer driven theme.
  5. A site editor driven theme has far fewer controls and options than your typical well written customizer driven theme. Theme developers have fewer resources with the site editor.
  6. You still seem to need to rely on the block editor to add content.
  7. Most versatile themes still need to rely on the customizer for support, so instead of editing your site with two different interfaces, you now have to use three different interfaces.
  8. The front page can only be updated in settings. And there seems to be issues with the site editor properly displaying the content of an updated front page. If the front page is changed, then the block editor front page, the site editor front page, and the live front page will all produce inconsistent content.
  9. The block editor and site editor look very similar, and it can be difficult to tell which one you are using. See problem 6.

Perhaps one day people will refer to the history of the site editor to be similar to the history of the block editor. But if I were you, then I would let other people experiment with the site editor with their sites and wait to see how it is improved in the future. It is worth noting that version 6.2 is removing the beta tag from the site editor, but I discovered many of the problems above during my testing of the release candidates still exist. I did not retest every problem, but I did not find any problems that had been resolved.

Questions?

If you have any questions, then please provide them in the comments section below.